


|
7 Lakes Archery
~ U-FINISH BOW BLANKS ~
I know many of you are interested in building a bow yourself but the start up cost in time, material and shop space is staggering. This is the perfect opportunity for you to finish a bow with a proven design and a minimum of tools. These blanks also make an excellent opportunity for a Father - Son/Daughter to spend some time together while building something all can be proud of. I'm getting off track here but after working with kids for 30 years it's my opinion that self esteem or confidence actually comes through real accomplishment, lavish praise for a half hour task is nice but misleading. This is a multi task project that will end with a smooth shooting, hard hitting bow that can be used for life or passed down to the kids. In other words something anyone will be proud of.
To build your blank I'll use the same Forms and Materials that I use every day in building my Custom bows.
This will be a partially finished bow that I will glue up, cut out and tiller for your shooting style. In order to maintain proper tiller I'll also rough out the arrow shelf and a grip of your choice. The blanks will come with instructions but soon I'll have a web page built, ready with pictures of each step.
The Blanks can be built from any materials used in custom bows. Pricing for blanks is on the pricing page and will give you a good price range. Basic blanks start at $275 for a longbow & $325 for a recurve. The Blanks comes to you already tillered. String grooves are roughed in, arrow shelf is also roughed in when I know if you are right or left handed. I also rough on a grip of your choice and size. A quarter sheet sander and a small chain saw file are the only tools you'll need. Instructions for finishing a bow are on my website.
If you have an exceptionally long or short draw length please let me know.
I usually have some blanks here in the shop I keep listed on the Bows in Stock page. Call if you don't see what you want, often I just haven't gotten around to listing everything.
BOW BUILDING DIRECTIONS
Safety and a Few Warnings:
a.Wear a mask when sanding or filing the glass. You do not want glass fibers in your lungs.
b.Be careful how you handle the bow, the glass fibers from the back and belly will cut you or worse, give you splinters that may be too small to see. So don't run your hand or fingers along the edge of the bow until after you've smooth sanded it.
c.The glass has a grain. This grain runs straight down the glass lamination and can be split off just like a wood grain. Since the bow limbs are tapered/narrowed toward the tip the grain has been cut. Imagine that it's ok to run your knife blade along the edge from the handle to the tip but if you reverse it and try to cut off a snakeskin from the tip toward the handle, the blade will cut into the glass grain and pull it up.
d.The same holds true when you are filing out the string grooves or rest. I like to tape over the glass to help insure fibers are not pulled up in these areas. Pull off tape from handle to tip. Always file from the glass toward the wood.
A Work In Progress, Tillering:
The blank will come to you already tillered, there is almost no way for you to mess it up. This is how to check tiller: Measure the distance from the fadeout to string on the top and bottom limb. For split finger shooting style the bottom limb measurement should be slight stronger (shorter) than the top limb. If you shoot with the 3 finger under release you should tiller the bottom limb even in strength with the top limb. The shorter the bow, the more critical even tillering makes to the 3-finger under shooter.

Weight Reduction:
Reducing weight by a couple of pounds is no big deal. We will be working on the back of the bow, the side facing the target when you draw. First go down each edge evenly, removing or really rounding over the glass. Just be sure your work is even on each side.
When you have shaved off either edge of the bows back and still need to lose a little more you can sand the back. Use a stiffener behind the sandpaper and check tiller often. Remember you can't put it back. Use long smooth strokes and don't weaken any one spot.
Still need to reduce? Shave/sand a little more off either side of the back. This will give you a trapezoid cross section. Many custom bowyers use this design to reduce limb weight so you aren't hurting anything. Just be sure you check the bows weight and tiller often.
Overlays:
Tip overlays add strength and beauty to the bow and they are easy to install. Overlays allow you to cut a string groove all the way across the back of the bow and make it fast flight ready. I like Fast flight strings. The strings are just easier to build than Dacron due to the way string fibers hold wax and don't shred as bad. It's also a little faster but rougher on the bow. I always put on tips and here's how:
The glass backing is already flat so you epoxy a flat lamination of hard wood 2" long, I cut them a little longer to give me something to hold on to. Rough up all matching sides with a bit with 60 to 100 grit sandpaper and remove all dust. Remove the dust again. Glue and clamp with epoxy and you have a tip. It will add greatly to the bows looks and insure the string groove doesn't get crushed with Fast Flight. File the overlay down until it gently fades in with the back of the bow. Remember not to file away any of the glass backing so take it easy here. Rasp the edges and tip into shape then with the rat-tail bastard (should I be saying that) you put the string groove nice and straight across the overlay and file out the glue that oozed into the original string grooves. Make sure everything is nicely rounded over then as a last step take a piece of 220 grit sandpaper, wrap it around the file and clean out the string grooves. Repeat this after you've had the waxed string on and off during tillering and shooting. The string will leave enough wax that your finish will not adhere to the wood if you forget.
Grip Overlay:
Use the same basic steps as listed above. Use a 8" to 10" piece of flat wood or phenolic (depending on riser length). Just don't put the overlay out onto the working part of the bow. A grip overlay will give you added strength plus it makes for a nice rounded grip.
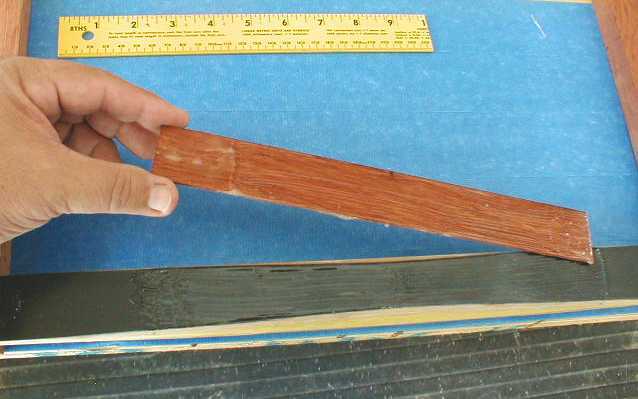
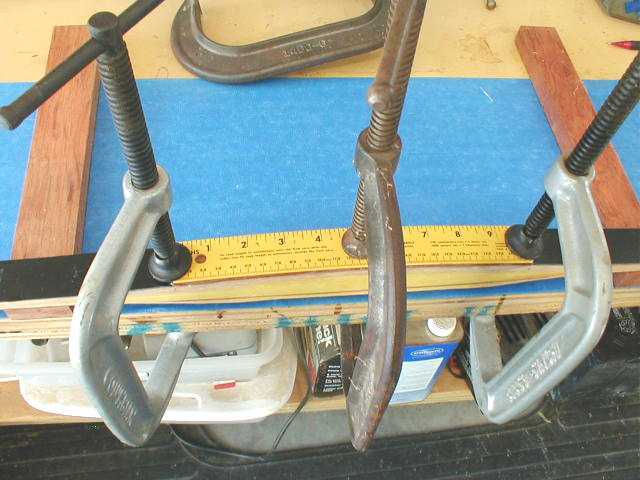
Grip overlays made simple:
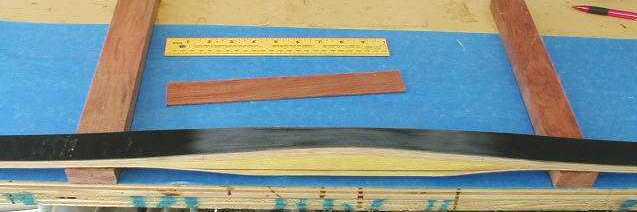
My grip overlays are 10" long. I've cut off a piece of metal ruler that also does double duty as a pressure plate. You'll see the ruler on top of the Bubinga overlay in future pictures. It evens out the pressure and prevents damage during clamping. In this picture you'll also notice I've sanded the glass, the glue will will not adhere well to the smooth finish of the glass. I know it looks terrible now but so does sheet rock before it's finished.
In the next picture you'll notice the two pieces of Bubinga that hold the bow off the table just enough to put on the clamps without the bow twisting all around. In my picture the grip is supported by the workbench. You must support both the limbs and grip. It's easier to add a grip overlay if the back of the grip is still square instead of rounded. In other words put on the grip overlay before you round off the back of the grip. It's important that the limbs & grip be supported before you begin tightening up the clamps.
Both the overlay and the back of the bow need to be buttered up nicely with glue. I use epoxy. When ever gluing anything butter both surfaces with glue. This is also the method to use for tip overlays.
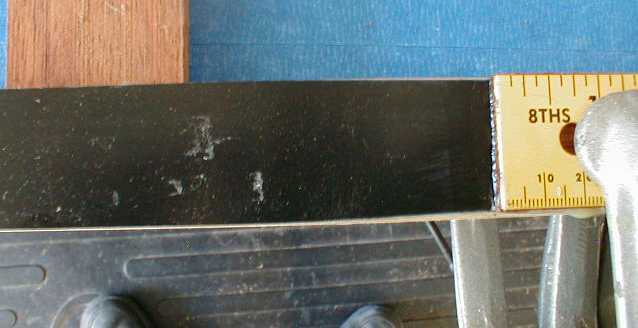
The overlay is under the ruler. The ruler is pretty stiff and functions as a pressure plate as well as keeping the clamps from marking the overlay. This ruler is from a yard stick from Lowes, it's exactly the right width. It's important that the pressure plate and overlay are the same length. I also make to them the same width so I can spring clamp from side to side to keep everything from squishing around with the first clamp.
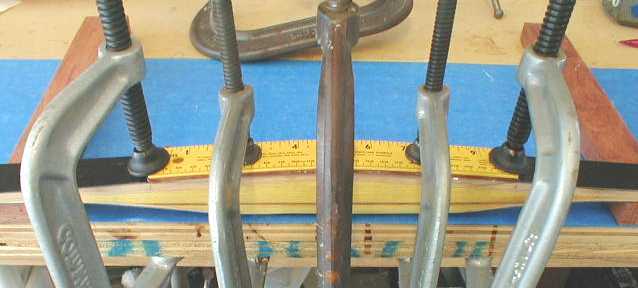
Notice the glue squeeze out. That's good. It means you've used just enough glue. Be careful here not to over tighten and squeeze out all the glue, particularly at the tips. Also notice the previous glue runs on my bench so look out below. Use Saran wrap to keep things neat.
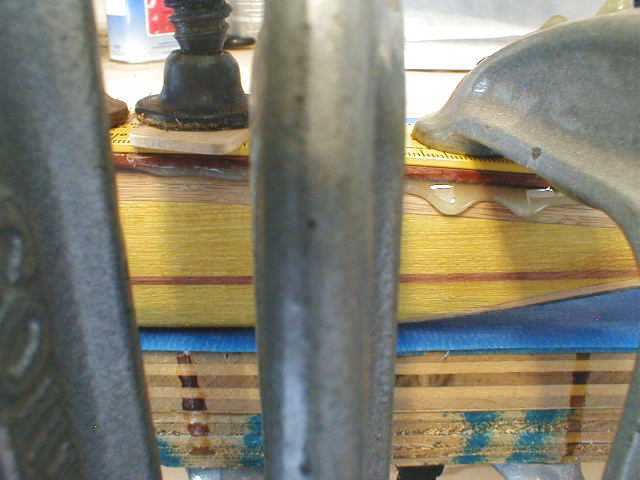
Now wipe the excess glue from the back of the bow. This will save you time and trouble when you begin feathering in the overlay. Be careful not to wipe any solvent under the tip. I use a clean rag or paper towel. No solvent.
The last step is to finish clamping the overlay, then attach a light on either end for heat curing the epoxy. It's important to check the clamps and make sure they are still firmly tightened.
Rasping and sanding the bow:
First rule is... You can't put it back, once you have sanded or rasped too much you are pretty much stuck, so go slow. Tied for first rule is... Only handsand the glass on the back and belly with 220 grit, nothing rougher.
A 1/4 sheet palm sander will save you many hours, they are inexpensive and common at any home improvement store. They have the added advantage that they can be used for shaping with rough sandpaper.
Sandpaper comes in many roughness and grades. There is no need to buy the most expensive, automotive grades. Start with the roughest you can find, normally 36 grit or 40 grit. (Grit is a reference to the number of grains avg. in one square inch.) So the lower the number the rougher the paper. Use the roughest grit to remove all the rasp & file marks. This will normally take 2 pieces of paper cut into quarters to make 8 pieces for your 1/4 sheet sander. Once all the rasp marks are removed move to 60-80 grit, use this to remove all the marks left by the 36 grit paper. You will probably need 1 piece of paper cut into quarters, I use 1 quarter on each side of the limb and half the riser on that side. Work your way up through the grits until you finish with 220 grit. The bigger the jumps in grit the more paper it will take to remove the last sanding marks.
Don't be afraid to really round over that limb glass (starting with the rougher grits) just try to take the same number of sweeping strokes on a 45 degree angle on each side of the limb, and top and bottom.
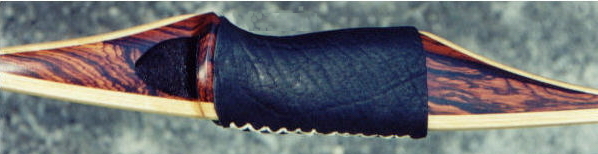
The grip makes the bow. I've rounded it over a bit but now is the time to break out the rasp and make that grip fit your hand. A caution here: The grip feels different when you pull the string and put the bow weight against your palm. Plan on taking your rasp to the range with you and use it as you shoot. Believe me you'll find a ridge or rough spot when you start shooting that you could not feel in the shop and it's far easier to repair BEFORE you spray your finish. If you plan to put on a leather grip remember it will increase the size of the grip. Probably more than you realize.
The arrow shelf is already cut in for you. You should not deepen it much more as it will effect the safety of the bow. This bow is designed to shoot well without being cut to center. Be sure to leave 1/8" from center.
Leave the shelf rounded to the sight window; you will receive it already filed this way. This design adds strength. let the paper hang off one side and use the overhang on the arrow shelf.
Limbs:
Once again, sand the glass surface with 220grit paper by hand. Nothing rougher, if you need to rasp go from the glass to the wood or you'll lift the glass fibers.Round over all the edges. The shiny glass surface must be hand sanded with 220 grit as it has a protective coating that will not accept any finish I'm familiar with. Be sure to really smooth over the glass edges. I recommend sanding down to 220 grit or finer paper.
Work through all the grits starting with the 36 grit and ending with the 220 grit. (exception is the shiny glass surface, only hand sand with 220 grit).
Surface sanding the glass will make it "look" cloudy and dingy. On clear glass you won't even be able to see through it. Don't worry. Everything is ok. Wet it and you'll be able to tell how it will look when you apply the finish.
Finishing:
Think about using Tru-Oil. It's a stock refinishing product that wipes on great in thin layers. Any gun shop or most Wal-Mart's carry it. It's not a tough finish but it has advantages. Any scratch can be sanded out and the Tru-oil reapplied any time. In fact you can refinish the entire bow quickly and easily.
Instructions for spraying:
Before I talk about finishing you have a little prep work. All dust must be removed. I wipe the bow down with Acetone. It does not leave a film and dries in seconds. Use Dawn or other oil removing soap on your hands. More than once I've found my fingerprints under the finish where I left some oil on my fingers. Look at the bow while it's wet. You'll find "a bunch" of places where you need to go back and sand some more. Don't get in a hurry at this point. Take the extra hour and smooth every rasp, file and sand paper mark out of the bow. Believe me when I tell you, stain and finish will highlight every single rasp/file/paper mark. You can't cover scratches with finish and expect a good-looking product.
I like to use Mini-Wax stains then cover with 5 to 6 thin coats of Mini-Wax "Helmsman Spar Urethane". These stains are compatible and available in all large and small hardware stores. Don't use the stains with poly already mixed in, they are a goopy mess.
Porous wood grain can be filled by spraying on the Spar Urethane then sanding it back off until the pores are filled. In most woods you can't fill the pores by really caking on the finish so don't try.
Thin coats of finish are best, they dry quicker and you avoid the runs. Don't be tempted to spray on a few heavy coats because "I'm in a hurry" "Looks great now" or you'll be sorry. The split second it looks "wet" stop spraying. I MEAN IT.
Now you have a run or two and it looks terrible, "I told you thin coats were better" but here's what you do. Wait until the run is absolutely dry before you sand it off with 220 grit sandpaper. I know you're impatient but you'd better listen this time or you'll start pealing up the previous coats.
Ok, you couldn't wait and now you've smeared the run, pealed up your other coats and things look horrible. Things aren't horrible they just look that way and I'll bet you are ready to listen now. LET THE GOOPY SPOT DRY. Then sand it down and feather in the edges. This time spray THIN coats back over the spot.
Sand with 220 or smoother grit paper between coats for an absolutely perfect finish. All sanding dust must be removed between coats or you are just making it worse.
Call Me!
I'm not much of a writer and the directions may not be the easiest to follow. I build bows as a hobby, a relaxing past time. I enjoy talking bow stuff so feel free to call with any questions. This way I can find out where I need to re-write my directions.
Send Pictures!
I enjoy seeing how the bows turn out so send a picture when you're finished. I also collect hunting stories.
Send positive criticism!
Let me know where I can add more detail to these instructions. This is supposed to be fun and I know how frustrating it can be to try to operate when you don't have enough information.
|
|
|